A Very Basic Guide to All-Grain Brewing
We do FREE all-grain demos every month at our storefront. Check out our website or follow our social media to stay informed of dates and times! Also, customers 21+ get to help us drink the beer from our previous month's demo.
***Quick Note: brewing software, such as Brewer's Friend (click here!) makes recipe development and brewing calculations much much less intimidating and more predictable.***
This guide discusses how to make a mash without using any extracts. A mash may made from barley, wheat, corn, rye, or a combination of these ingredients. Those that brew using the all-grain method do so for a variety of reasons, but such reasons may include: maximum freshness, complete control over the recipe, complete control over mash fermentability and beer profile, or perhaps just the joy of crafting something from scratch.
Here we discuss two methods of the all-grain brewing method- the more basic Brew in a Bag (BIAB) method and what we'll refer to as the "full-scale" method. The latter is the most common method; it's employed by commercial brewers and is typically the method meant when people refer to all-grain brewing. People often use BIAB as an intermediate step between extract brewing and full-scale all-grain brewing because it requires less equipment. BIAB will be discussed at the bottom of the page. If you are interested in BIAB, read through the full-scale method as it contains information pertinent to all methods of all-grain brewing. Whichever method you choose, we hope you enjoy all-grain brewing as much as we do!
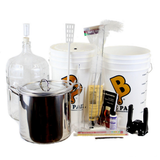
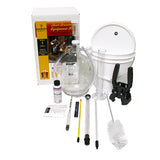
A note on equipment: Regardless of the method you employ, you will need a pot large enough (at least 8 gallons) to accommodate the full volume. Also, you will need a way to chill the wort quickly; an immersion wort chiller or plate chiller is recommended. In addition to those items, we also sell assembled all-grain equipment and the components necessary for building your system. Additionally, we are a licensed Blichmann retailer. Ask us how we can help you put together your own system!
Full Scale Method
All-grain brewing basically consists of five steps: Mashing, Sparging, Boiling, Cooling, Fermenting.
Mashing: Mashing is the process of steeping grains in hot water inside of a vessel, called a mashtun, for a period of time to allow malt enzymes to convert the malt's starches into fermentable sugar for brewers' yeast. To do this you will need a mashtun that contains a false bottom. Brewing equipment and systems can be as complex as some commercial breweries, but many people simply retrofit a cooler or large keg with a spigot and false bottom and achieve wonderful results; you don't have to spend a small fortune to brew all-grain and make great beer (but you can if you want!).
- Ensure that your grains are properly milled and at room temperature. You want the mill's crush to break the husk of the malts, exposing the starches inside, but not pulverize the kernel; husks are necessary during sparging. We recommend always using some rice hulls in your grist, especially if using a lot of huskless adjuncts such as wheat or flaked adjunct such as flaked oats. Rice hulls are really cheap insurance against stuck sparges and they help create even mash temps throughout your mashtun.
- For mashing, use a water to grist ratio between 1 and 2qt/lb. Beyond these ratios and your mash will be either too thick or too thin; either way, the enzymes will not be as effective and your efficiency will suffer. We recommend a ratio of 1.25 qt/lb (i.e. 10lbs malt X 1.25qt = 12.5 quarts of water, or 3.125 gallons). Make sure to use good water; you may wish to review our very basic guide on water chemistry.
- After calculating how much water to use for mashing, heat the water to 15 degrees Fahrenheit above your target mash temperature. It is a good idea to heat a little extra in case you don't quite hit your target temp. You will lose heat to the mashtun, the grain, and the atmosphere as you mix the water and grist. After you brew on your system several times, you will better know how much over your target temp to heat your strike water (you may consistently only lose 12 degrees, or maybe it's colder where you live and you lose 17 degrees). The 15 degrees F is just a guideline to get you in range until you know your system better. So, if you come in high, add a little water to bring it down; if you're low, add some hot water to bring it up. Always add water in small increments.
NOTE ON MASH TEMPS: The typical range is between 145F and 160F. At lower temps, the enzymes convert more slowly but thoroughly. This will yield a beer with less body and more alcohol, but requires a longer mashing time (90 minutes). Conversely, high temps convert quickly, but leave behind more dextrins, which are unfermentable by brewers' yeast. This yields more body and mouthfeel, but less alcohol. For most beers, brewers choose somewhere in the middle, mashing at around 152-3F for an hour. - Add the strike water to your mashtun and then add your grain in increments, being sure to stir it in well and not let doughballs clump up and form in the mash as this will hurt your efficiency. When fully mixed, take a temperature reading and add some hot or cold water as needed to hit your target. Put the lid on your mashtun and have a beer. Note the time and set a timer if needed. Mash for specified time.
Sparging: Sparging is the process of rinsing the grain and collecting your now sugary mash water, called sweet liquor. There are two ways to sparge: batch sparging, and continuous or fly sparging. Either way, heat 2 qts. water/lb grain to 168-175F. (i.e. 10 lbs grain X 2qts. = 20 qts., or 5 gallons).
Batch Sparging: This method requires an extra pot- perhaps your old extract brewing pot?...
- Heat your sparge water in a pot large enough to accommodate the volume.
- Vorlauf. Do this by recirculating the liquor. The point is to set the grain bed so as to later drain off clear and clean liquor for boiling. Open the ball valve in your mashtun and collect wort in a small saucepan or large measuring cup. Pour the liquor back into the top of the mashtun. Repeat the process several times until the liquor is running clear and free of chunks.
- After vorlaufing, drain the sweet liquor from your mashtun into your other pot; you'll collect less liquor than the original amount of water added because your grain absorbs 1/5th and your false bottom will usually trap 1/2 to 1 gallon, depending on your system and equipment.
- After draining your mashtun, add all of your sparge water at once to the mashtun. Allow to settle for 10 minutes. Make sure your first runnings are in your boil kettle and then again drain your mashtun into the kettle until you have your pre-boil volume (usually about 6.5-7 gallons).
Fly/Continuous Sparging: This method requires another vessel, called a hot liquor tank (HLT).
- Heat your sparge water. While it's heating, do your vorlauf in your mashtun.
- Once your sparge water is at temperature, add it to your HLT. The most common HLT will be, like the mashtun, an insulated cooler with a ball valve installed (but without a false bottom).
- Set up a 3-tier system, with the boil kettle at the lowest point, the mashtun in the middle, and the HLT at the highest point. You will slowly drain the sweet liquor from the mashtun into the kettle while at the same time draining sparge water from the HLT into the top of the mashtun. Ideally, you want the flow going into the mashtun to equal the exit flow rate from the mashtun. Make sure that you have about a 1inch layer of sparge water above the grain bed; this helps ensure that the water is flowing through the grain bed evenly and not channeling. Sparging typically takes about 30 minutes--- not too fast, not too slow.
- Stop collecting when you reach your pre-boil volume. As you become more proficient and familiar with your system, you will be able to more accurately calculate the exact amount of sparge water to use (your grain will absorb about 1/5 of your mash water and you'll have loss to the false bottom as well).
Boiling: This part is easy and not unlike extract brewing. Just boil the wort for the specified time (usually about an hour) and make your hop additions at the called-for times. Don't cover your kettle during the boil; this will cause DMS to condense and fall back into the wort. DMS is a natural byproduct of the mashing process, but if it remains in the beer, it lends a creamed corn flavor that isn't very desirable.
Chilling: A fast chill is extremely important in order to reduce the chance of infection, get fermentation off to a fast start, and help prevent the reformation of DMS. Now that you're doing a full-volume boil, you'll need an efficient way to chill down all that beer wort; ice baths don't cut it anymore. One of the best tools for the job is an immersion wort chiller, which works as a heat exchanger to pull heat from the wort. If using such a chiller, you can recapture the discharge water from it and use it for cleaning and mixing up some sanitizer.
Fermenting: Now that you've prepared a delicious beer wort and placed it in a sanitized fermenter, let the yeast do its thing. Every fermentation will be a bit different, but we recommend leaving beer in the fermenter for two weeks (for most average gravity beers). Fermentation will likely be finished before then, but it's good to give the yeast some extra time to condition and clean up the beer.
You may wish to do a secondary fermentation; if so, rack (fancy word for transfer) the beer out of primary when most activity has ceased, usually about 4-7 days. Allow to sit in secondary for another 1.5-2 weeks (depending on recipe).
Brew in a Bag (BIAB)
Make it through all of the dense material above? Excellent. You will apply the same concepts, but with less equipment.
You will still need a kettle large enough to accommodate the full-volume boil (10+ gallons is best). Instead of a mashtun, you will be using your kettle to mash in.
Steps:
1) Place milled grains in a nylon bag large enough to hold the grist. We sell reusable bags specifically for this purpose.
2) Heat your mash water in the kettle and then place your bag-o-grain in to mash. You may wish to wrap the kettle in an old sleeping bag or blanket to help insulate it. Mash at desired temperature for desired time.
3) While mashing, heat up sparge water in a separate pot. When mash is finished, lift bag out of kettle and place in a colander above the kettle. Resist the very natural tendency to squeeze the grain bag; you risk squeezing out proteins, flour, and tannins. Instead, "sparge" by slowly pouring your sparge water through the grain bag to rinse out trapped sugars.
4) Boiling, Cooling, Fermenting... Same as above!